

Exporting data with Sys ID/GUID (Globally Unique ID)
In some scenarios, we need to know Sys ID of multiple records. But Sys ID field is not easily available for users to display on forms and lists and reports. This is because this field contains the unique numerical identifier for each record. If the Sys ID is modified or deleted, this would lead to bad data and/or data loss.
The below method can help you retrieving the Sys ID or displaying the Sys ID field on the forms, lists and reports.
Scenario 1 : If your business requirement is to make the sys_id field visible on the list.
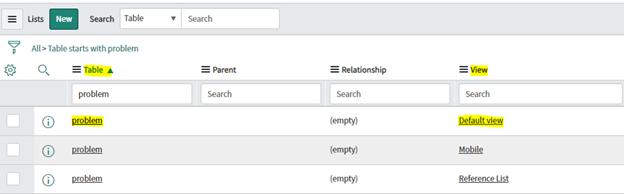
1. Navigate to System UI -> Lists
2. Search the Table on which you want to add the sys_id field and Open it. (Check the view on which you want to make the changes)
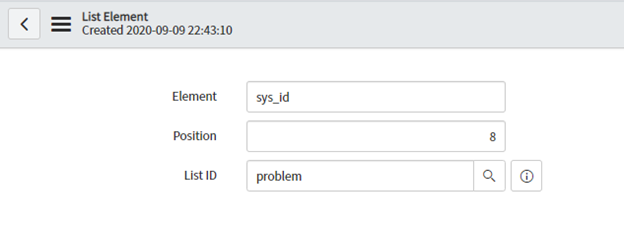
3. In the List Elements related list, click the New button. Populate Element = sys_id and Position with a number for the place in the list.
4. Navigate to Application Navigator and execute cache.do
5. Once you navigate back to your list, the Sys ID field will be visible.

Scenario 2: If your business requirement is to make the Sys ID field visible on the form.
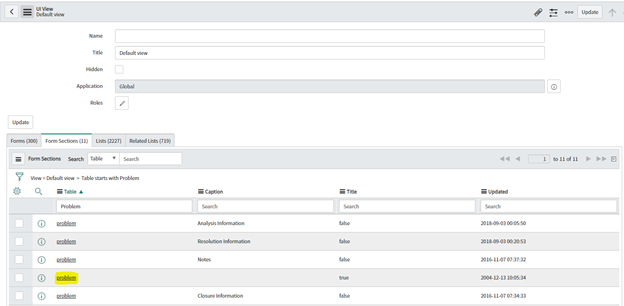
1. Navigate to System UI -> View
2. Search and Open the View you would like to modify.
3. In the Form Sections tab, filter by your table name and then open the record for the form section you would like the Sys ID field to be visible in. The top form section for every table will not have a Caption and will appear blank. This is expected behavior.
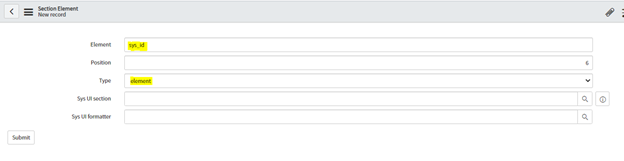
4. In the Form Section record, click the New button on the Section Elements list. Populate Element = sys_id, Type = element, and Position with a number for the location on the list.
5. Navigate to Application Navigator and execute cache.do
6. Once you navigate back to your Form, the Sys ID field will be visible.
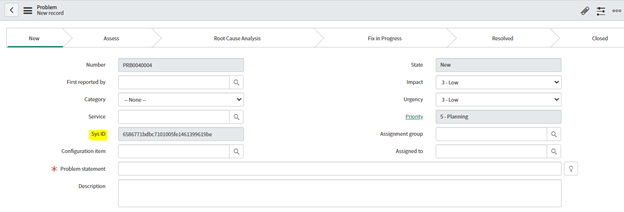
Note: This field should ALWAYS be read only. There is an OOB ACL (*.sys_id/write) which prevents write access for all users, even admins. Please DO NOT make this field editable for any user, as this could lead to considerable data loss issues.
Adding the Sys ID to a form or list view or a report as explained above will still prevent users to export the Sys ID values to a file.
We can export the sys_id by constructing a URL
Constructing a URL
By the help of “sysparm_default_export_fields=all” parameter , Sys ID can be exported.
This parameter tells the web service to export all fields from the table including the Sys ID. Beware that this also brings every other field along with it.
Steps:
1. Navigate to the list of records.
https://<instance>.service-now.com/problem_list.do?
2. Build your filter (If required as per business need)
https://<instance>.service-now.com/incident_list.do?sysparm_query=active (I have applied filter as Active is TRUE)
3. Copy URL and place into new browser window and Add &CSV&sysparm_default_export_fields=all to the end of the URL
https://<instance>.service-now.com/incident_list.do?sysparm_query=active&CSV&sysparm_default_export_fields=all
4. Press Enter
5. A CSV file with all fields including sys_id will get exported.
Scenario 3: If your business requirement is to see the Sys ID field on a report.
1. Navigate to System Definition > Database View
2. Create a new View and add the table you want to report on. Add a Where clause if needed.
3. Select the Fields to add to the View. Make sure to select the sys_id field too (As you have already added the Field)
4. When done save your View.
5. When done save your View.
Reference: https://docs.servicenow.com/